Introduction
Thank you for your purchase! I hope you will enjoy building your handheld game of blackjack!
IMPORTANT SAFETY INFORMATION:
Only solder in a well-ventilated area while wearing safety glasses. It is strongly recommended that you solder directly in front of a soldering fume extractor to help remove any fumes from the heated solder.
While soldering, the soldering iron, solder, PCB, and electrical component may become dangerously hot. Solder on a non-flammable surface, with no flammable materials at your work space, and always be cognizant of where your soldering iron is.
The PCB in this kit uses a fiberglass core. Do not attempt to cut, scratch, or break the PCB, as it may introduce fiberglass particles into the air.
The PCB and some of the components of this kit contain lead. Do not eat or drink while handling the kit, or put the kit and/or its pieces in your mouth.
Some of the leads on these parts are sharp, be careful not to injure yourself!
Before we get started, it is best to review a few things. First, if this is your first time soldering, it may be worth reading the "Basics of Soldering" page linked below. If you want to learn more about basic PCB and electronics, you can read the "Basics of Electronics" page linked below.
Assembly
|
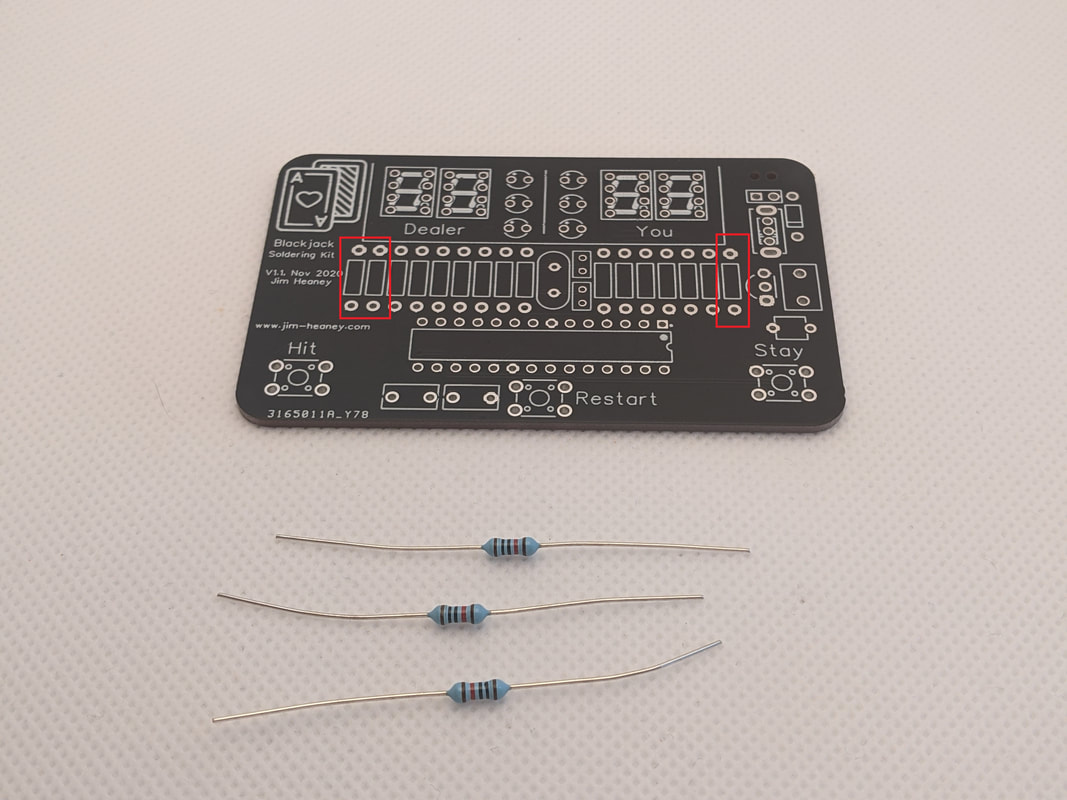
Step 1: 10k ResistorsFirst, install the 3 10k pull-up resistors on the board. Two go on the far left, and one on the far right. The 10k resistors are the ones that are not on a tape in the kit.
To install the resistor into the board, bend the leads and press them through the holes. The body of the resistor should be touching the board. We will install the 120 resistors the same way.
|
|
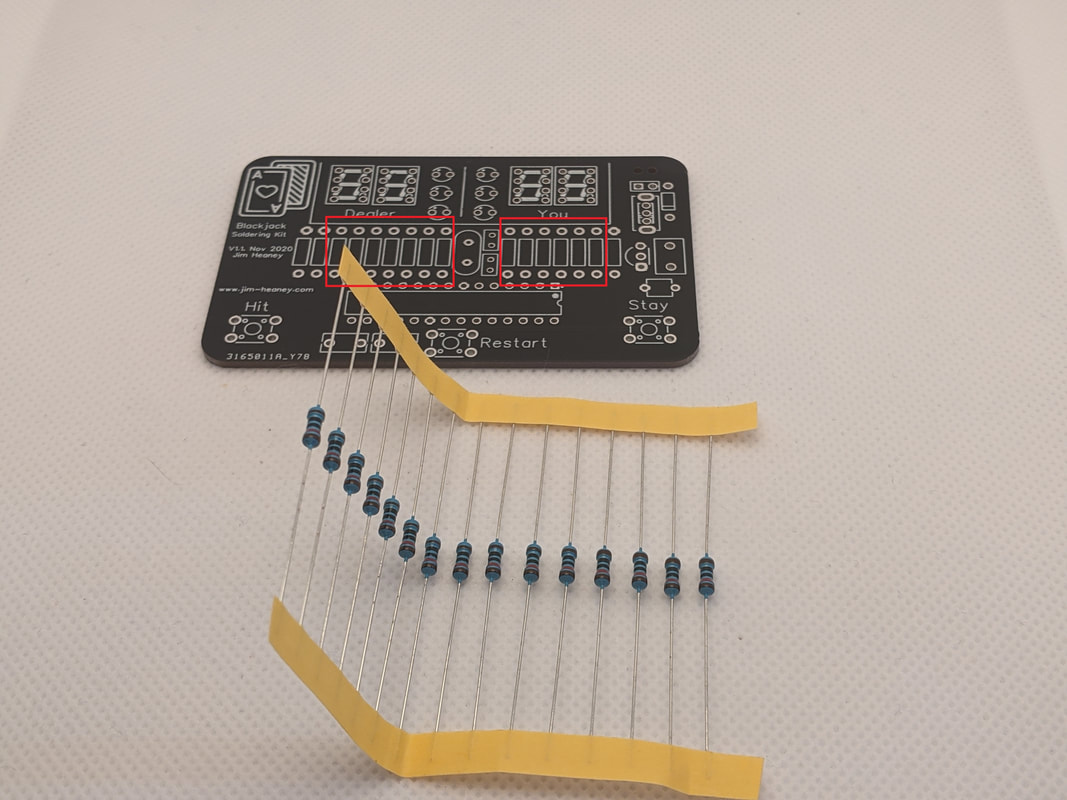
Step 2: 120 ResistorInstall the 120 ohm resistors next. They fill the remaining spots along the row in the center of the board. The 120 ohm resistors are the ones that come on a tape. Be careful! They look very similar to the 10k ones.
|
|
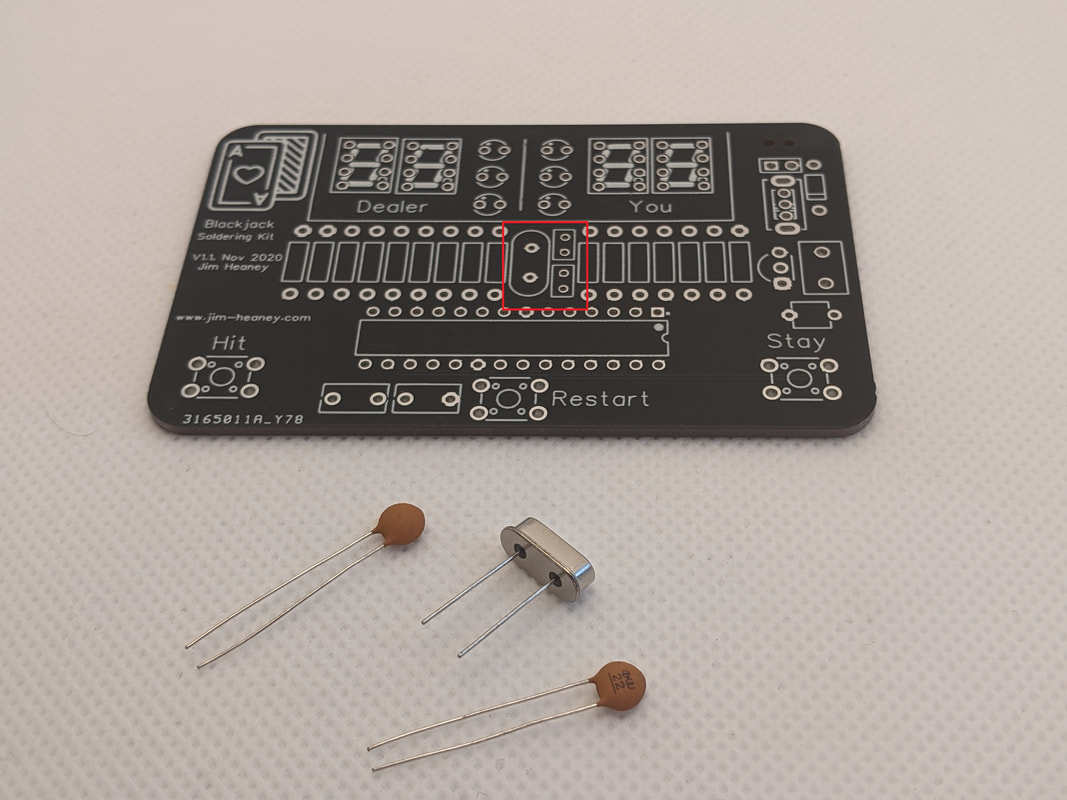
Step 3: Crystal ResonatorThe microcontroller uses a crystal resonator to keep track of timing. Install the silver resonator in the center of the board, and the two resonator capacitors (small beige disks) to the right. The orientation of these parts do not matter.
|
|
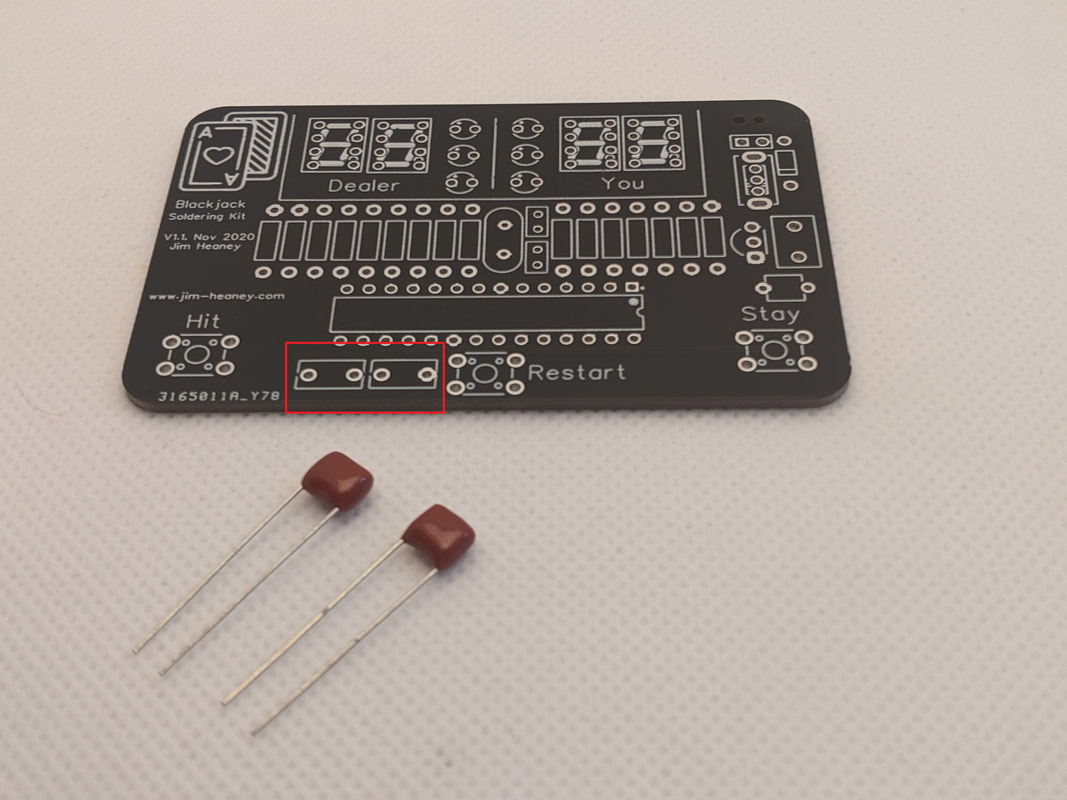
Step 4: Microcontroller CapacitorsInstall the two 100nF capacitors (burgundy rectangles) at the bottom of the board. Like the resonator capacitors, the orientation of these do not matter.
|
|
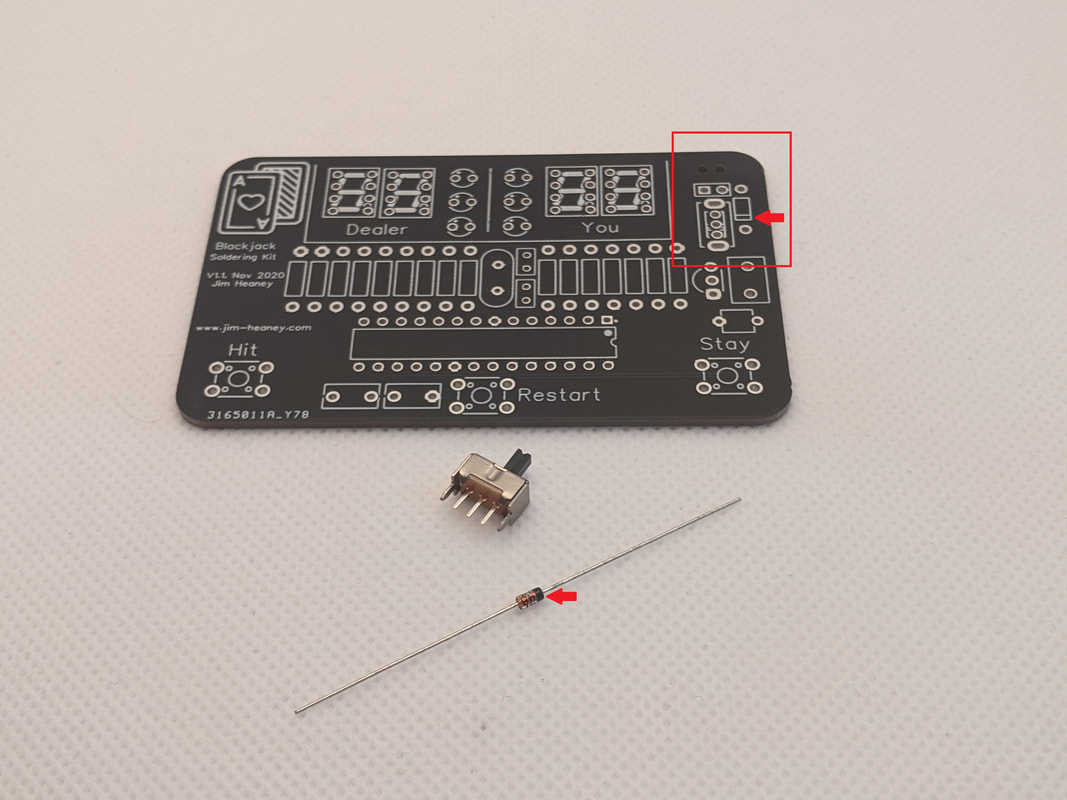
Step 5: Power InputNext, install the power switch in the top right corner of the board. The orientation does not matter. Be careful when soldering the large, external pins of the switch, as they are connected directly to the outside house and will make it very hot!
After the switch is in, we'll install the battery diode. The diode goes to the right of the switch. The black edge of the diode should align with the mark on the silkscreen (i.e. facing downwards).
|
|
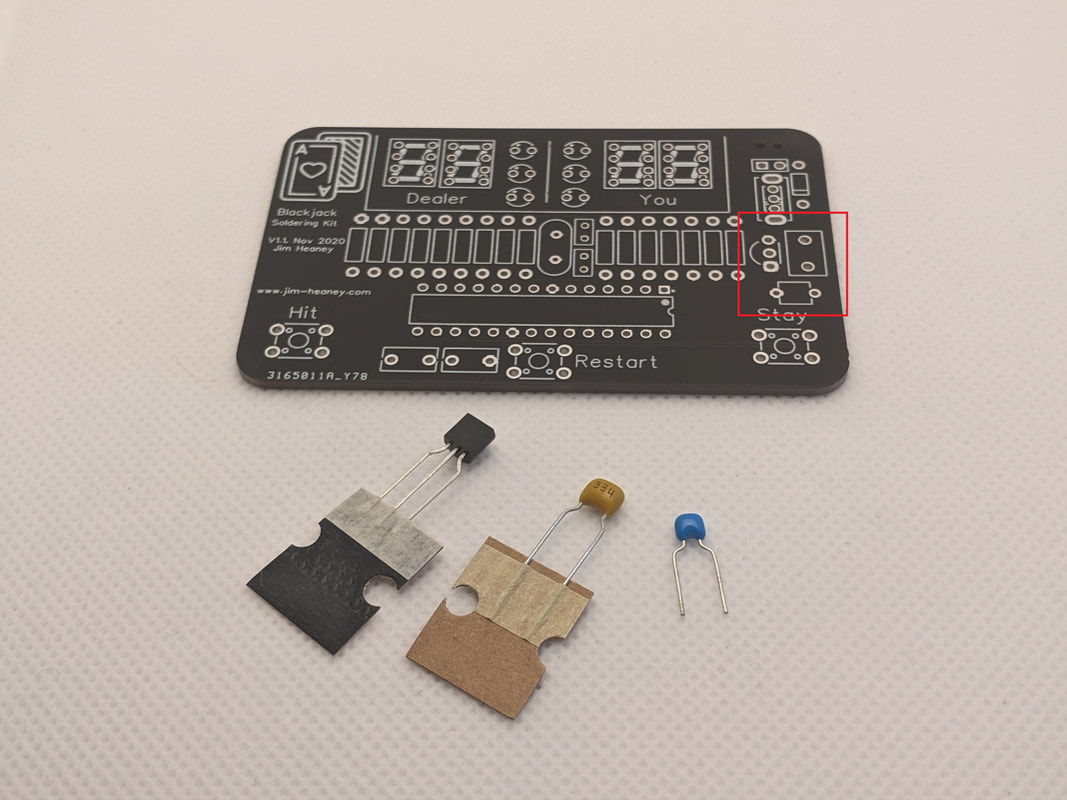
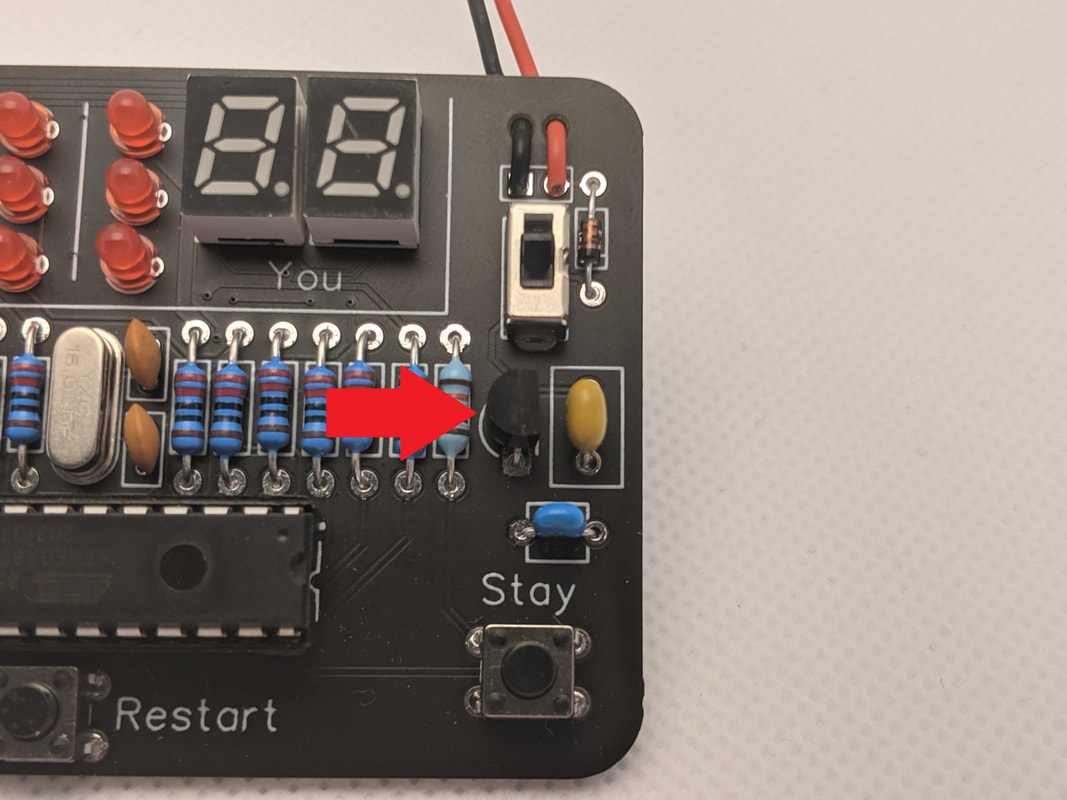
Step 6: Voltage RegulatorThe voltage regulator is made of three parts; the TO-92 regulator, and two capacitors.
The capacitor goes to the right of the resistors. Be careful of the orientation! The curve of the TO-92 package must match the curve printed on the silkscreen.
The orientation of the capacitors do not matter. The larger, yellow capacitor goes to the right of the TO-92, and the smaller, blue capacitor goes below it, above the "Stay" button.
|
|
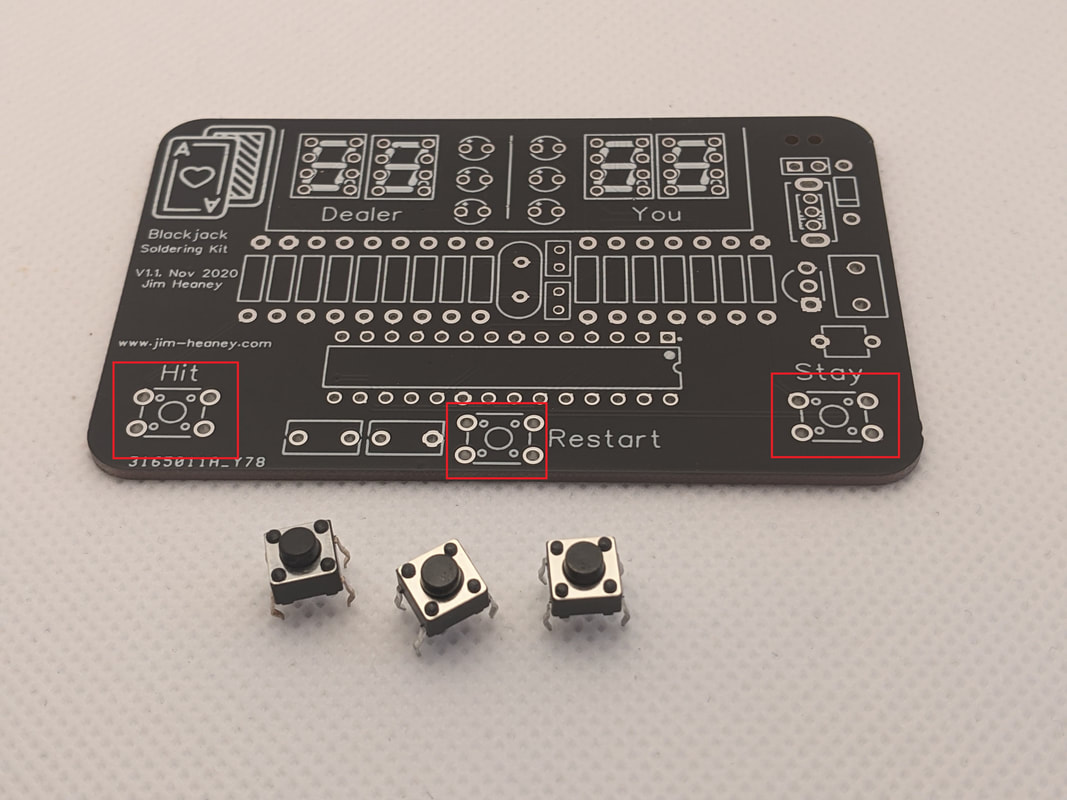
Step 7: ButtonsInstall the three buttons along the bottom of the board. The orientation does not matter from an electrical standpoint, but they do only fit in one orientation (pins coming out of the left and right).
|
|
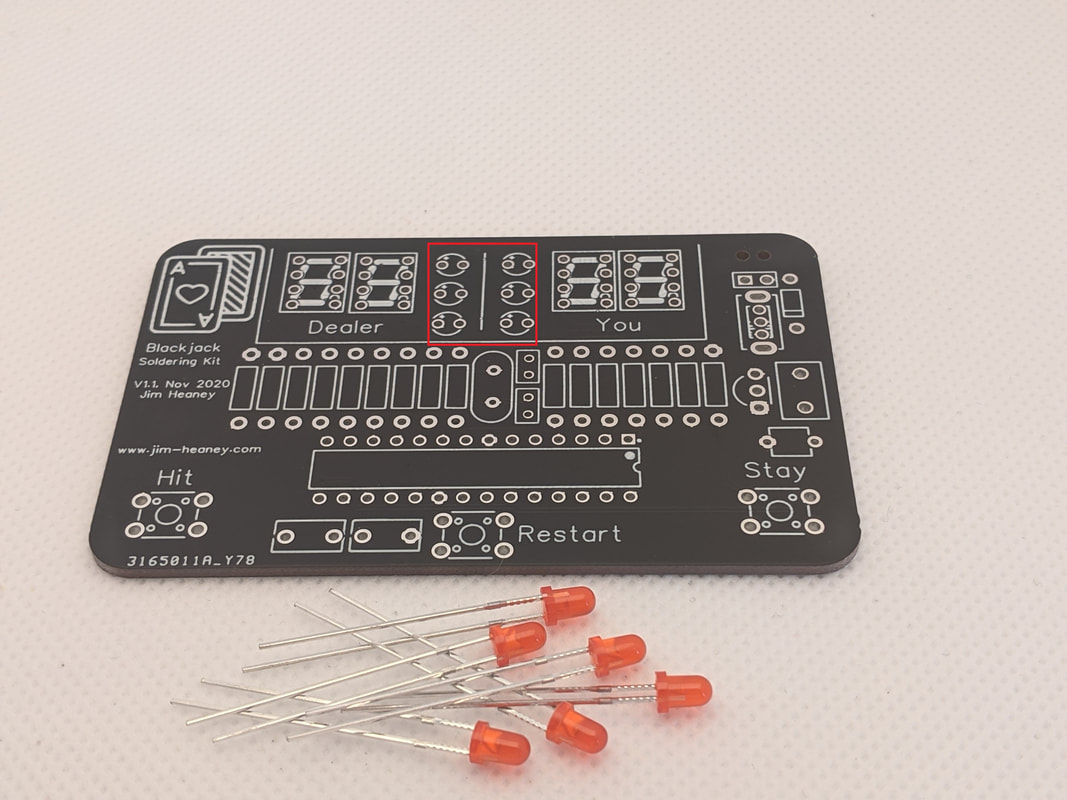
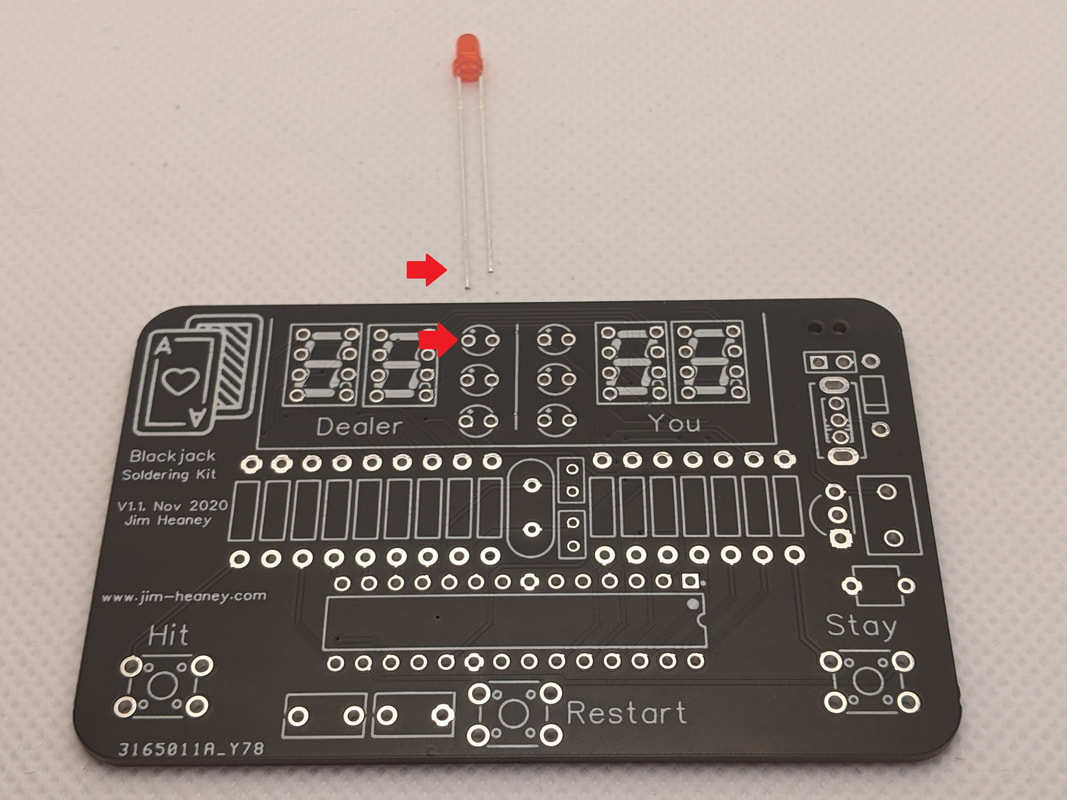
Step 8: LEDsThe 6 red LEDs go in the top center of the board. Be careful, the orientation does matter! The longer leg of the LED goes into the hole marked with a +, as seen to the left.
Once the LEDs are installed, put the 7-segment displays in to the left and right of the LEDs. Make sure that these are oriented properly, with the decimal towards the bottom.
|
|
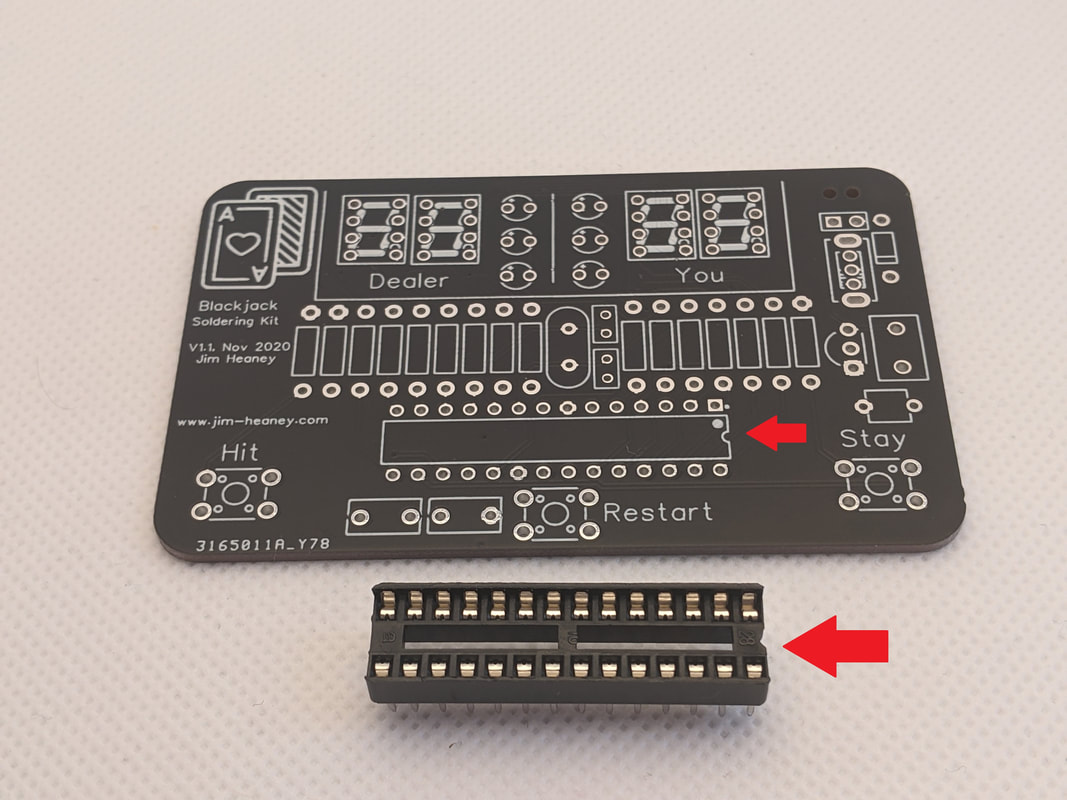
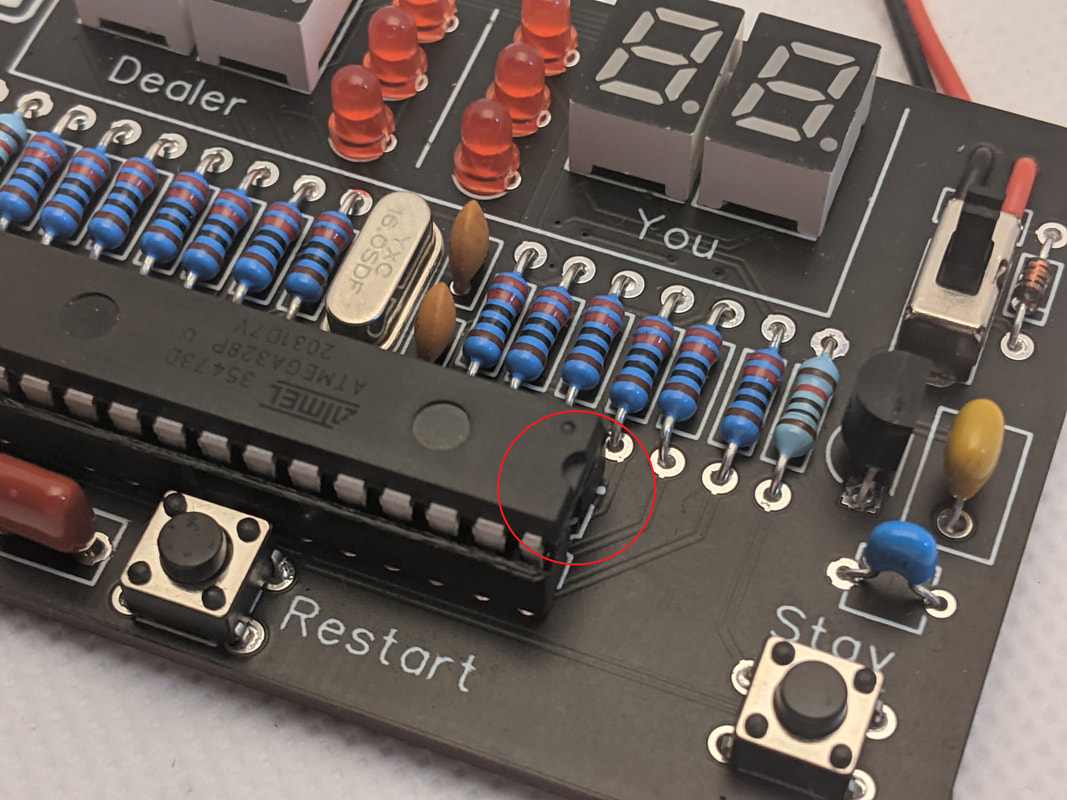
Step 9: Microcontroller SocketThe microcontroller socket goes in the bottom center of the board. There is a small notch cut on one side, that should go to the right. This is not important from an electronics standpoint, but is used as a reference to align the microcontroller properly.
|
|
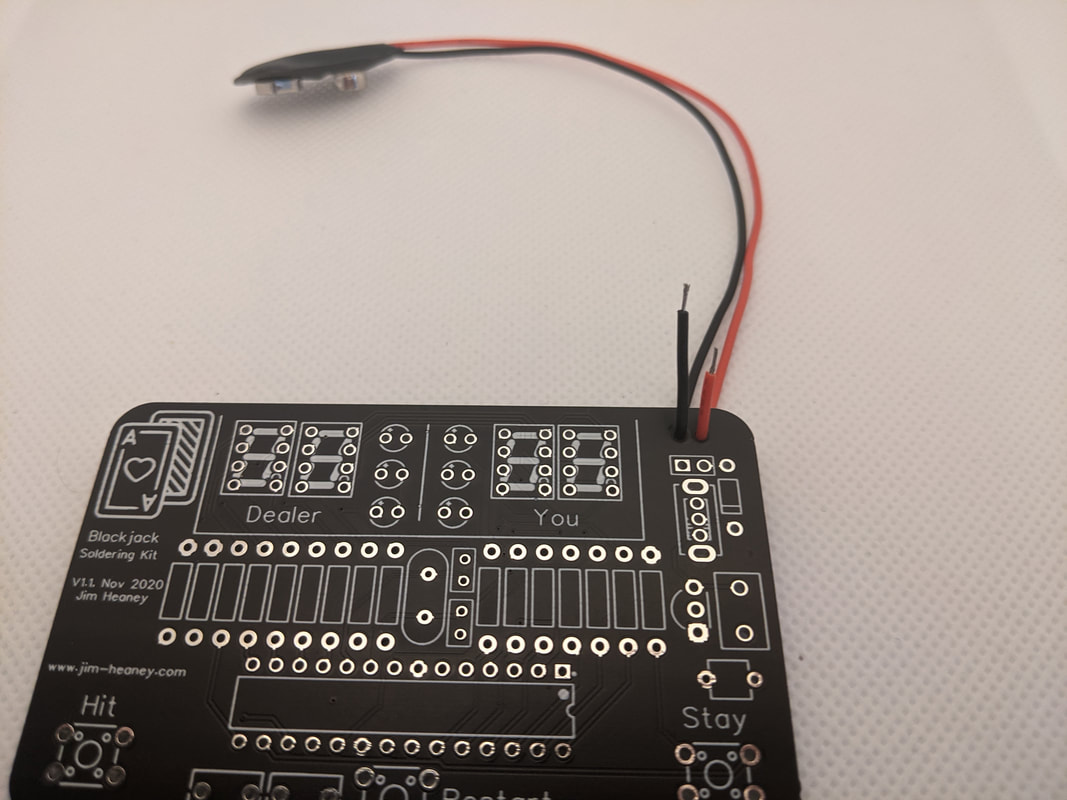
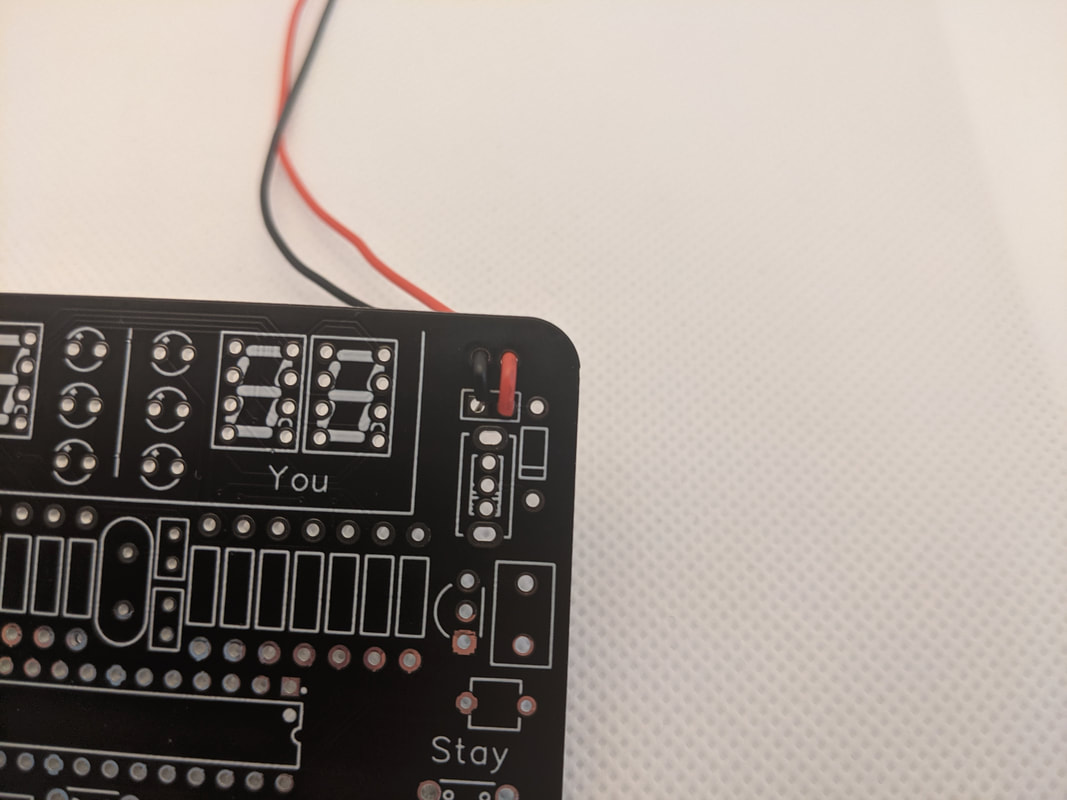
Step 10: 9V ClipInstall the 9V battery clip from the back of the board. Push the wires up through the holes in the top right, with the red (power) one being on the outer edge of the board. Once they are through, bend them over and solder them into the two holes above the switch. Once soldered, pull the wires taught.
|
|
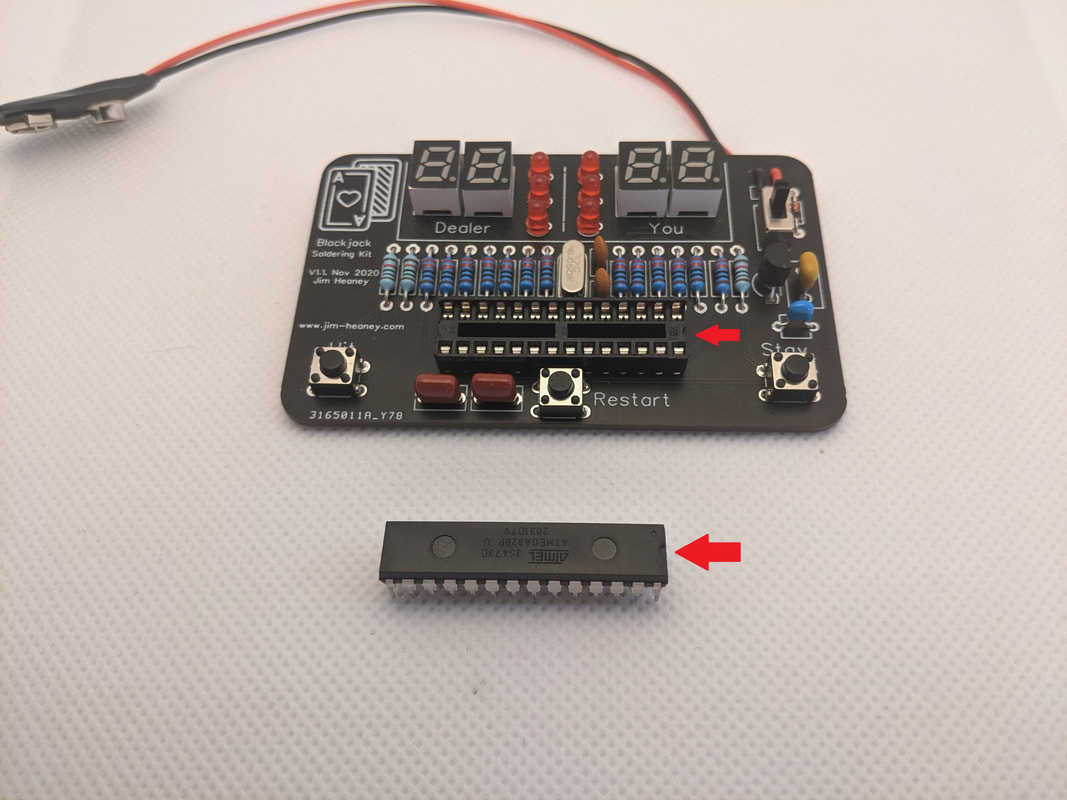
Step 11: Install MicrocontrollerFinally, install the microcontroller in the socket. The notch on the top of the microcontroller should go on the right of the socket.
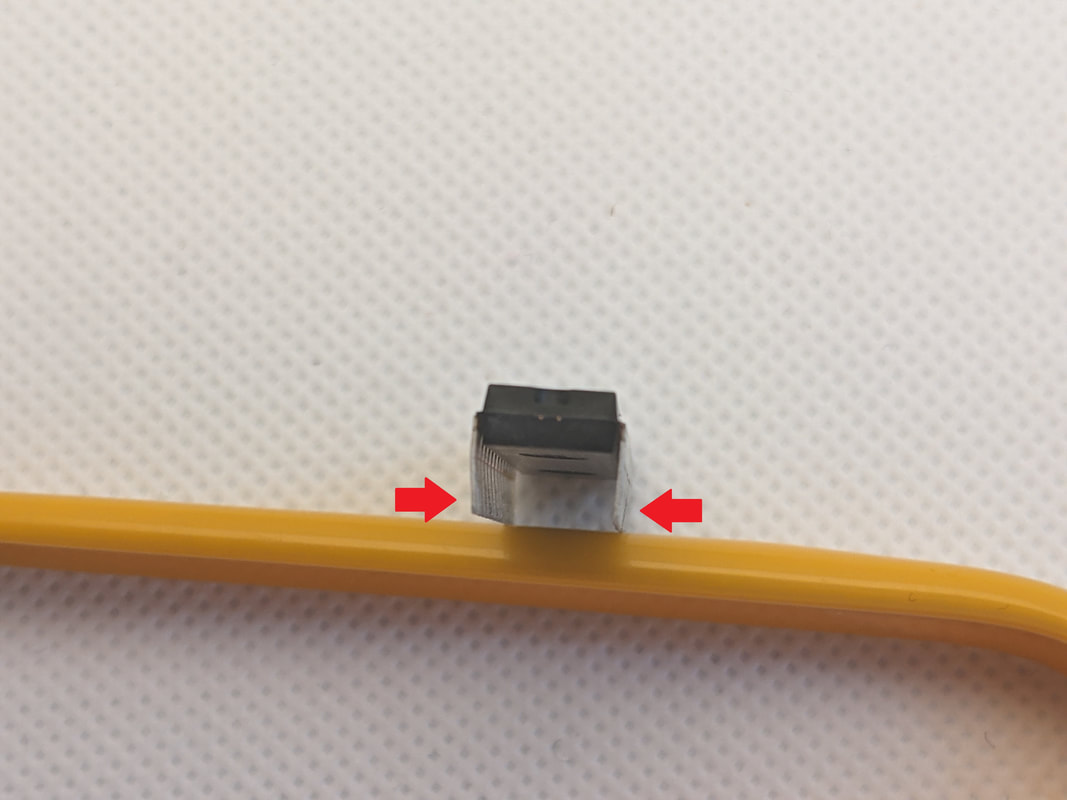
Sometimes, the microcontroller pins are splayed a bit too far out to fit into the socket. If this is the case, rest it on a table and apply slow, even pressure to the other side's pins to bend them square.
Once the pins are aligned, apply equal pressure to the top until the microcontroller descends into the socket.
|
|
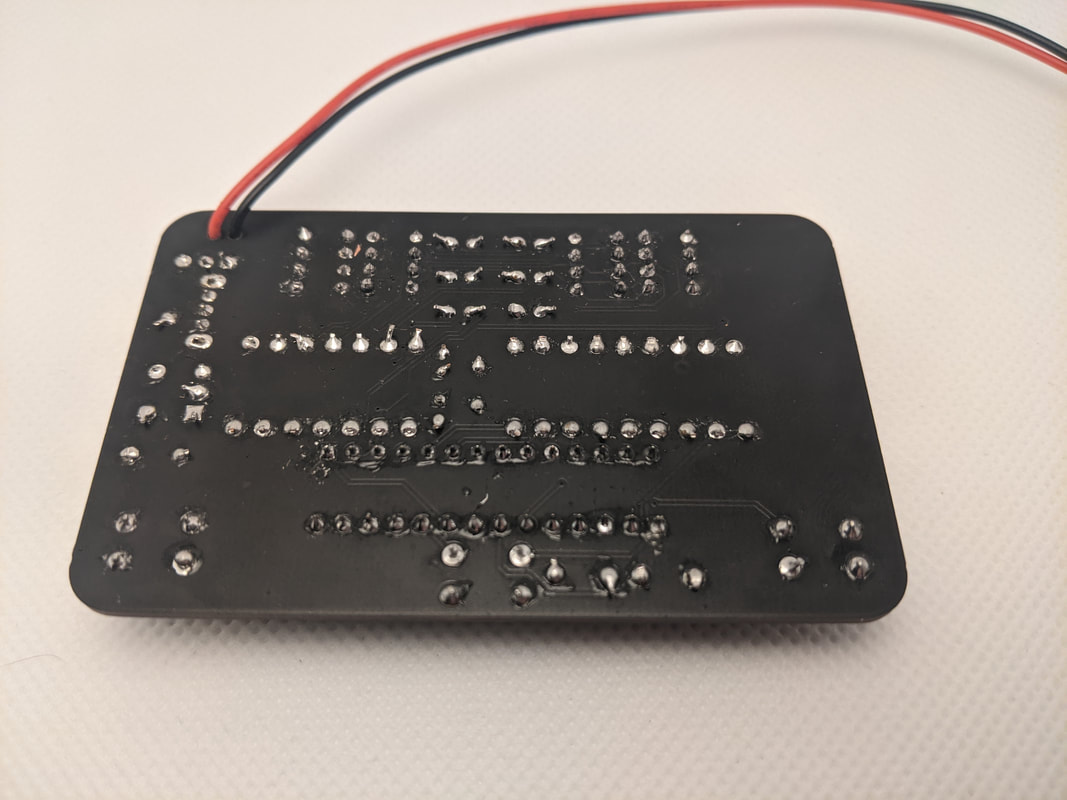
Step 12: Leads CleanupFlip the board over and cut the leads extending out of the bottom. Make sure to wear safety glasses, in case they go flying!
|
|
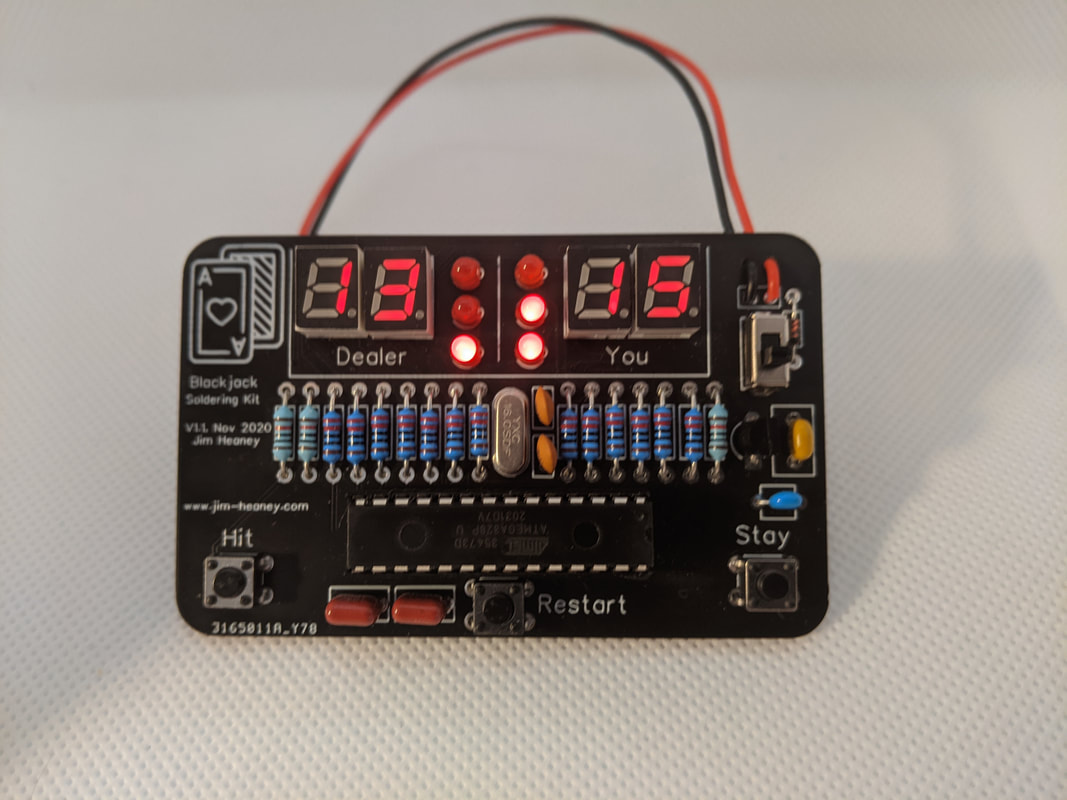
Complete!Your kit is now complete! Install a 9 volt battery, and move the switch to the down position to turn it on.
|